Quick start
In this tutorial, you will create an Agent and run it within a Network using AgentKit.
Creating a single agent
Section titled “Creating a single agent”-
Install AgentKit
Within an existing project, install AgentKit and Inngest from npm:
Terminal window npm install @inngest/agent-kit inngestTerminal window pnpm install @inngest/agent-kit inngestTerminal window yarn add @inngest/agent-kit inngestYou can always find the latest release version on npm.
Don’t have an existing project?
To create a new project, create a new directory and initialize it using your package manager:
Terminal window mkdir my-agent-kit-project && npm initTerminal window mkdir my-agent-kit-project && pnpm initTerminal window mkdir my-agent-kit-project && yarn init -
Create an agent
To start, we’ll create our first “Agent.” An Agent is an entity that has a specific role to answer questions or perform tasks (see “tools” below).
Let’s create a new file,
index.ts. Using thecreateAgentconstructor, give your agent aname, adescription, and its initialsystemprompt. Thenameanddescriptionproperties are used to help the LLM determine which Agent to call.You’ll also specify which
modelyou want the agent to use. Here we’ll use Anthropic’s Claude 3.5 Haiku model. (Model reference)Your agent can be whatever you want, but in this quick start, we’ll create a PostgreSQL database administrator agent:
import { createAgent, anthropic } from '@inngest/agent-kit';const dbaAgent = createAgent({name: 'Database administrator',description: 'Provides expert support for managing PostgreSQL databases',system:'You are a PostgreSQL expert database administrator. ' +'You only provide answers to questions related to PostgreSQL database schema, indexes, and extensions.',model: anthropic({model: 'claude-3-5-haiku-latest',defaultParameters: {max_tokens: 1000,},}),});You’ll also need to set your provider API keys as environment variables:
Terminal window export ANTHROPIC_API_KEY=sk-ant-api03-XXXXXX.... -
Run the server
Next, we’ll create an HTTP server to run our agent. In the same file as our Agent definition:
import { createAgent, anthropic } from '@inngest/agent-kit';import { createServer } from '@inngest/agent-kit/server';// ...const server = createServer({agents: [dbaAgent],});server.listen(3000, () => console.log('AgentKit server running!'));Now we can run our AgentKit server using
npxandtsx(for easy TypeScript execution):Terminal window npx tsx ./index.ts -
Test our agent
To test our agent, we’ll use the Inngest dev server to visually debug our agents. Using
npx, we’ll start the server and point it to our AgentKit server:Terminal window npx inngest-cli@latest dev -u http://localhost:3000/api/inngestNow, open the dev server and select the functions tab (
http://localhost:8288/functions) and click the “Invoke” button: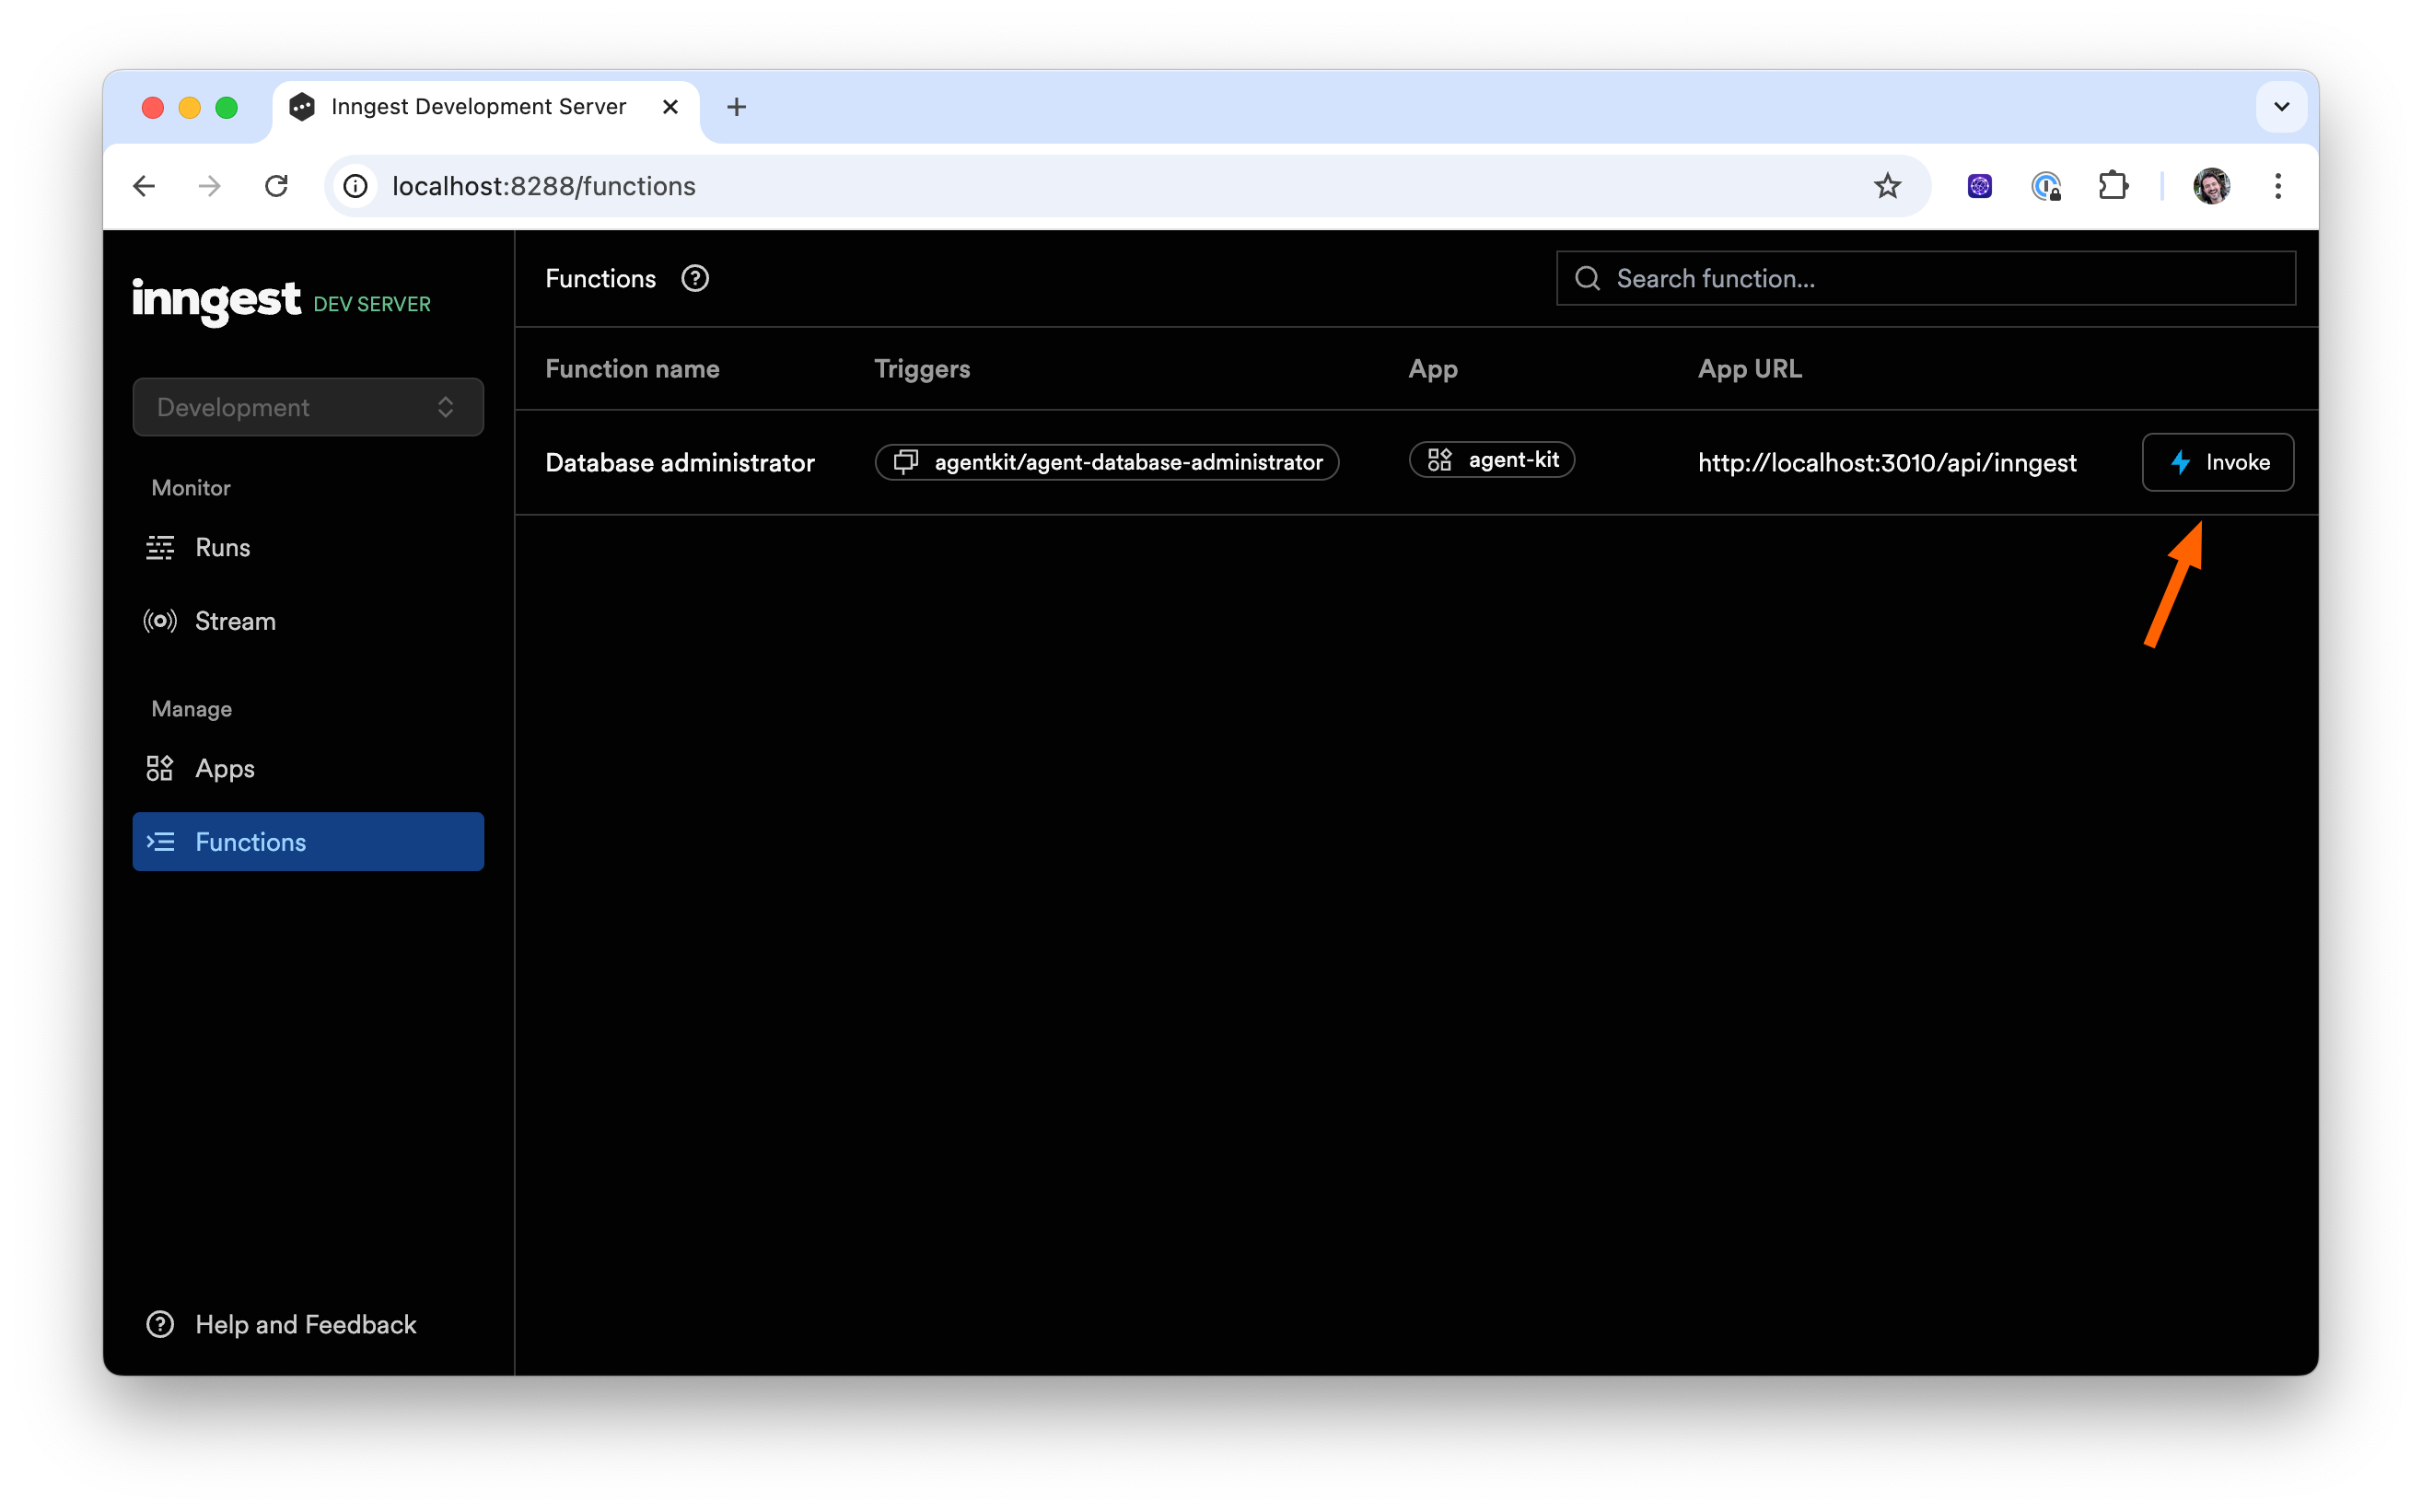
In the Invoke function modal, specify the input prompt for your agent and click the “Invoke function” button:
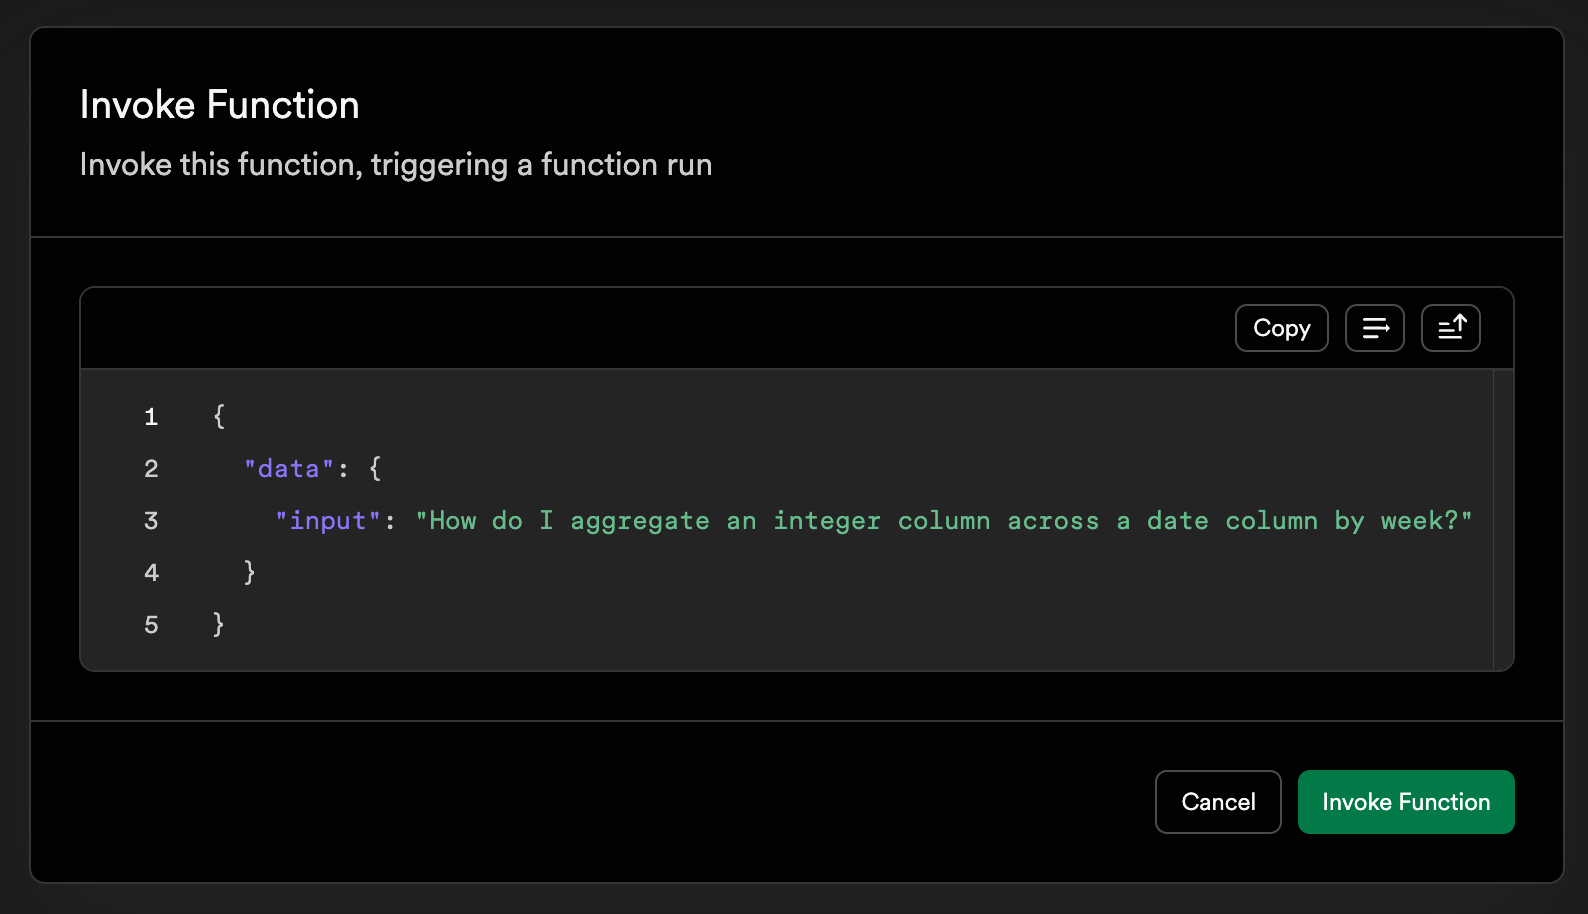 {"data": {"input": "How do I aggregate an integer column across a date column by week?"}}
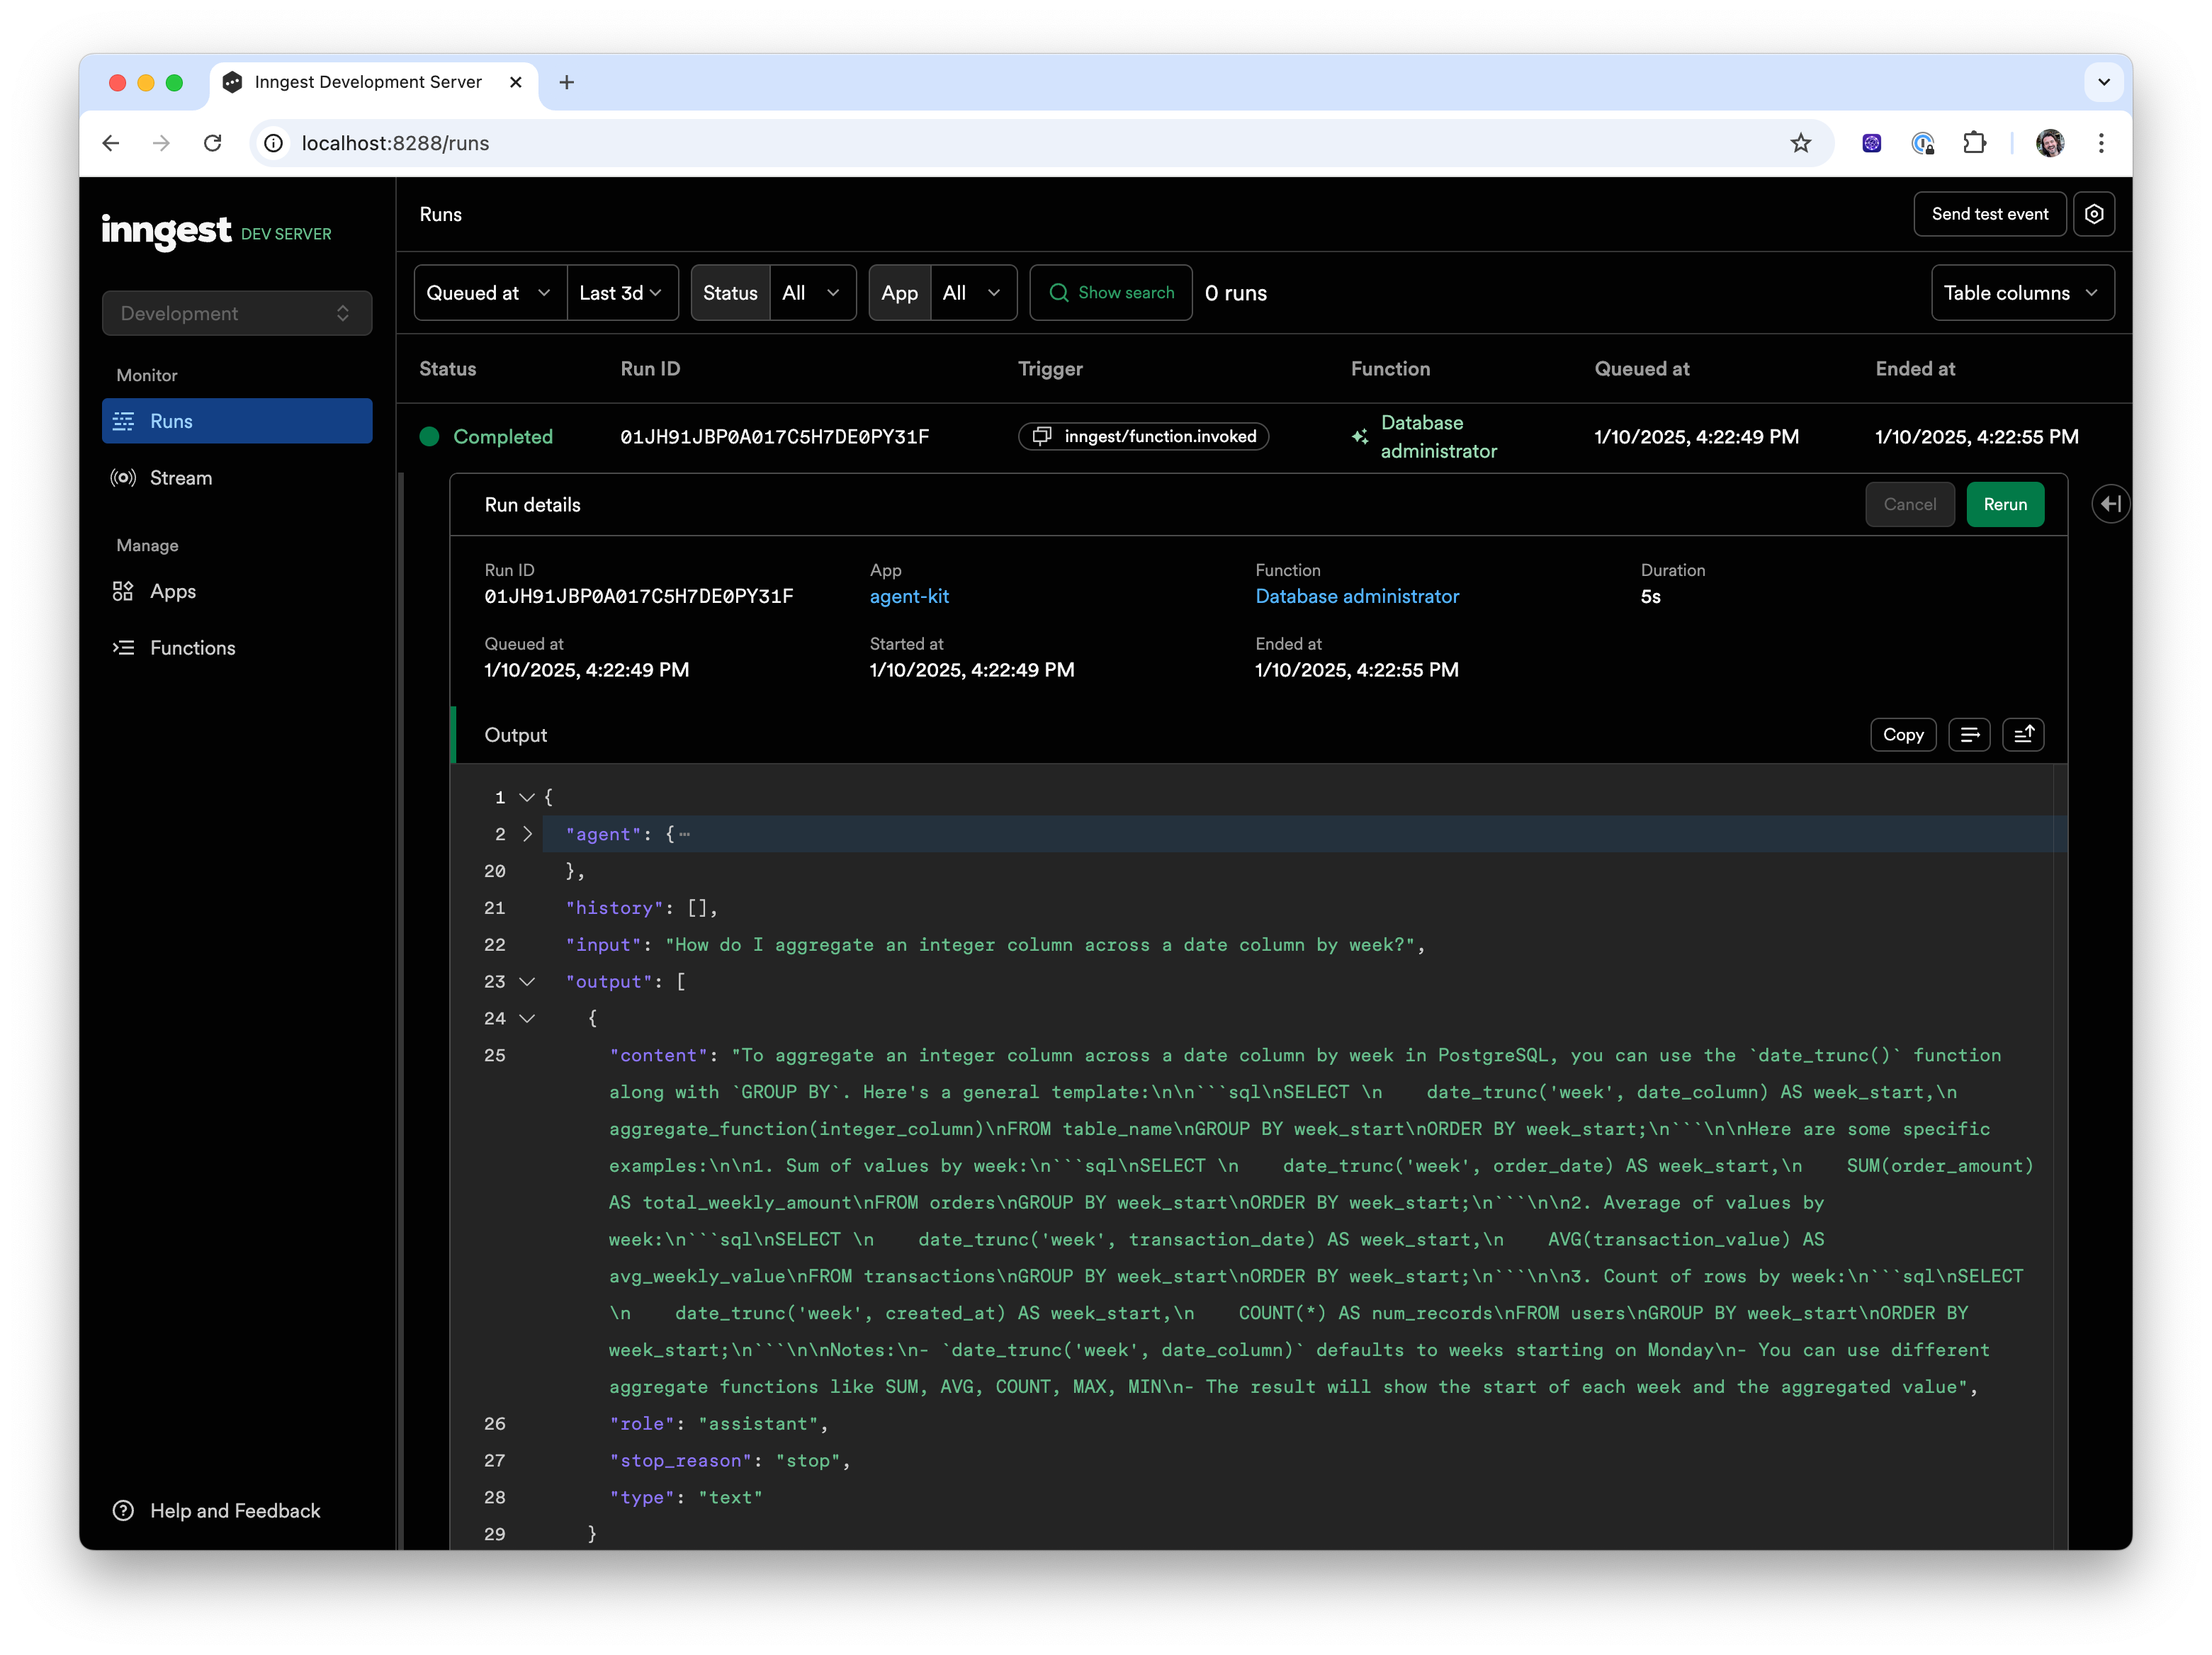
You’ll be redirected to watch the agent run and view the output:
A key benefit of AgentKit is the ability to create a system of agents called a “Network.” Networks are used to create AI Agents by combining multiple specialized Agents to answer more complex questions. Let’s transform our single agent into a network of two agents, capable of helping with both database administration and security questions.
Creating a multi-agent network
Section titled “Creating a multi-agent network”-
Adding a second Agent
Agents collaborate in a Network by sharing a common State.
Let’s update our Database Administrator Agent to include a tool to save the answer to the question in the database:
const dbaAgent = createAgent({name: "Database administrator",description: "Provides expert support for managing PostgreSQL databases",system:"You are a PostgreSQL expert database administrator. " +"You only provide answers to questions related to PostgreSQL database schema, indexes, and extensions.",model: anthropic({model: "claude-3-5-haiku-latest",defaultParameters: {max_tokens: 4096,},}),tools: [createTool({name: "save_answer",description: "Save the answer to the questions",parameters: z.object({answer: z.string(),}),handler: async ({ answer }, { network }: Tool.Options<NetworkState>) => {network.state.data.dba_agent_answer = answer;},}),],});Let’s now create a second Database Security Agent:
import { createAgent, anthropic } from "@inngest/agent-kit";// ...const securityAgent = createAgent({name: "Database Security Expert",description:"Provides expert guidance on PostgreSQL security, access control, audit logging, and compliance best practices",system:"You are a PostgreSQL security expert. " +"You only provide answers to questions related to PostgreSQL security topics such as encryption, access control, audit logging, and compliance best practices.",model: anthropic({model: "claude-3-5-haiku-latest",defaultParameters: {max_tokens: 1000,},}),tools: [createTool({name: "save_answer",description: "Save the answer to the questions",parameters: z.object({answer: z.string(),}),handler: async ({ answer }, { network }: Tool.Options<NetworkState>) => {network.state.data.security_agent_answer = answer;},}),],});Our second Security Expert Agent is similar to the first, but with a different system prompt specifically for security questions.
We can now create a network combining our “Database Administrator” and “Database Security” Agents, which enables us to answer more complex questions.
-
Creating a Network
Create a network using the
createNetworkconstructor. Define anameand include our agents from the previous step in theagentsarray.You must also configure a
routerthat the Router will use to determine which agent to call:import { /*...*/ createNetwork } from "@inngest/agent-kit";export interface NetworkState {// answer from the Database Administrator Agentdba_agent_answer?: string;// answer from the Security Expert Agentsecurity_agent_answer?: string;}// ...const devOpsNetwork = createNetwork<NetworkState>({name: "DevOps team",agents: [dbaAgent, securityAgent],router: async ({ network }) => {if (!network.state.data.security_agent_answer) {return securityAgent;} else if (network.state.data.security_agent_answer &&network.state.data.dba_agent_answer) {return;}return dbaAgent;},});const server = createServer({agents: [dbaAgent, securityAgent],networks: [devOpsNetwork],});The highlighted lines are the key parts of our AI Agent behavior:
- The
agentsproperty defines the agents that are part of the network - The
routerfunction defines the logic for which agent to call next. In this example, we call the Database Administrator Agent followed by the Security Expert Agent before ending the network (by returningundefined).
- The
-
Test our network
We’ll use the same approach to test our network as we did above.
With your Inngest dev server running, open the dev server and select the functions tab (
http://localhost:8288/functions) and click the “Invoke” button of the DevOps team function with the following payload:{"data": {"input": "I am building a Finance application. Help me answer the following 2 questions: \n - How can I scale my application to millions of requests per second? \n - How should I design my schema to ensure the safety of each organization's data?"}}The network will now run through the Agents to answer the questions:
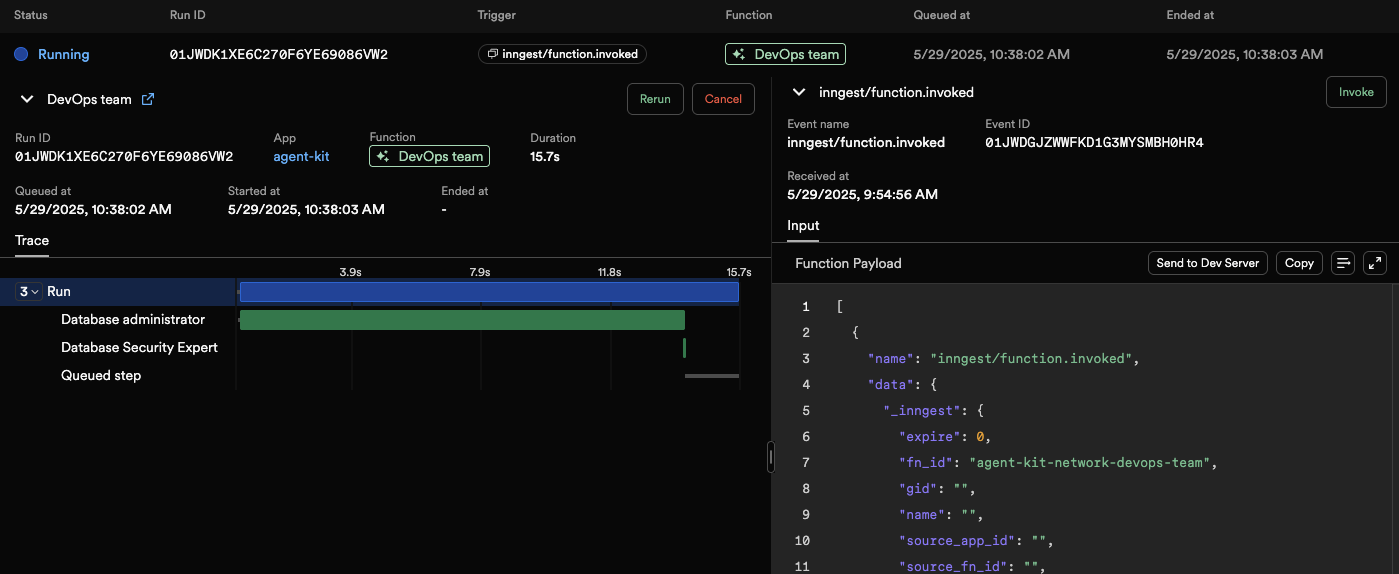
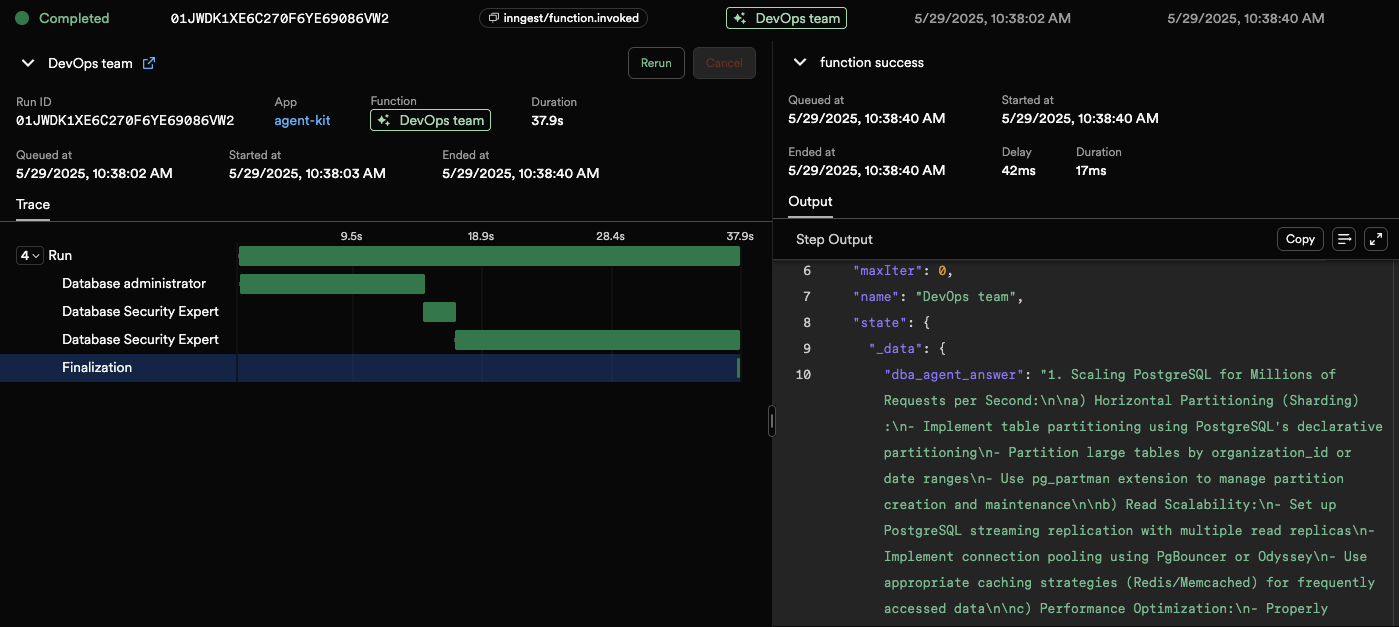
You can inspect the answers of each Agent by selecting the Finalization step and inspecting the JSON payload in the right panel:
Next steps
Section titled “Next steps”Congratulations! You’ve now created your first AI Agent with AgentKit.
In this guide, you’ve learned that:
- Agents are the building blocks of AgentKit. They are used to call a single model to answer specific questions or perform tasks.
- Networks are groups of agents that can work together to achieve more complex goals.
- Routers, combined with State, enable you to control the flow of your Agents.
The following guides will help you build more advanced AI Agents:
You can also explore the following examples to see how to use AgentKit in more complex scenarios: